
home for-sale how-we-build crokinole crokinole-gallery about-us
Next pageWe have two ways of handling the pegs. In one method, we use chrome-finished steel pegs, which you can see in some of our board photographs. These pegs are actually bookcase shelf pegs. In the second method, I make wooden pegs from dowels. The choice is always for artistic reasons. For the three boards, I will make wooden pegs. I choose the dowel size and peg length for each set entirely by whim, so they are never the same from board to board. Ready-made pegs can also be obtained from a crafts store. We found chrome posts at Woodworker's Supply, and they are part number 941-630.
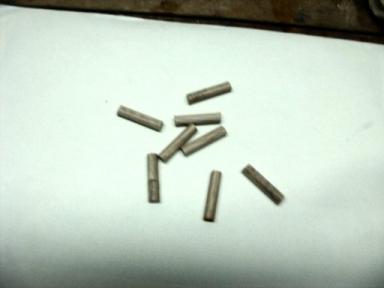 I begin by choosing a dowel rod and cutting eight segments of the same size,
usually about an inch in length. My plan will be to mount each peg in my drill
press and to use a wood file to work it down to my desired dimensions.
In the past, I have used a hand drill to hold the dowel and a dremel with a
wood cutting tool to do the same thing. I get more accurate cuts with my drill press.
I begin by choosing a dowel rod and cutting eight segments of the same size,
usually about an inch in length. My plan will be to mount each peg in my drill
press and to use a wood file to work it down to my desired dimensions.
In the past, I have used a hand drill to hold the dowel and a dremel with a
wood cutting tool to do the same thing. I get more accurate cuts with my drill press.
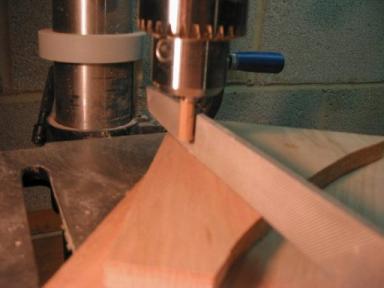 I cut the smaller diameter section that I will insert and glue into the board.
It needs to be 1/4" to 1/2" long. I mark each peg with a pencil at the desired
length, and I then insert each one in turn into my drill press. Next I lay a
wood file atop a couple pieces of scrap wood on the drill press table,
and I raise or lower the table until the file top is even with the pencil line.
I choose a model drill bit that I will use to drill the peg holes into the deck,
and I keep it at hand so I can estimate how big to make the peg inserts.
I then fire up the drill press and work the file back and forth until I have
reduced the insert size to the drill bit diameter. I lay the file on scrap wood
because it is easier to slide the file back and forth.
I repeat for all eight pegs.
I cut the smaller diameter section that I will insert and glue into the board.
It needs to be 1/4" to 1/2" long. I mark each peg with a pencil at the desired
length, and I then insert each one in turn into my drill press. Next I lay a
wood file atop a couple pieces of scrap wood on the drill press table,
and I raise or lower the table until the file top is even with the pencil line.
I choose a model drill bit that I will use to drill the peg holes into the deck,
and I keep it at hand so I can estimate how big to make the peg inserts.
I then fire up the drill press and work the file back and forth until I have
reduced the insert size to the drill bit diameter. I lay the file on scrap wood
because it is easier to slide the file back and forth.
I repeat for all eight pegs.
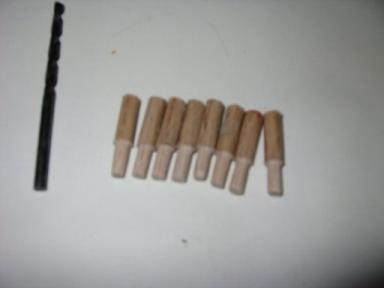 I have completed the insert end for Cowboyĺs pegs. My model drill bit is to the left.
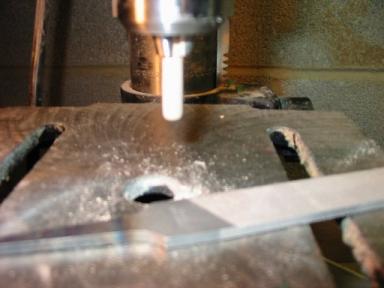 I next prepare the "show" side of the eight pegs. I insert the down side of each
peg into my drill press, and I adjust the table so that the file on the scrap wood
nearly touches the drill chuck. I then shave a little off the surface, and I
round off the peg top. Sometimes I add grooves or dimples. I finish each one by
sanding with a fine grit sandpaper. It is not important that the pegs be
identical, just similar.
I next prepare the "show" side of the eight pegs. I insert the down side of each
peg into my drill press, and I adjust the table so that the file on the scrap wood
nearly touches the drill chuck. I then shave a little off the surface, and I
round off the peg top. Sometimes I add grooves or dimples. I finish each one by
sanding with a fine grit sandpaper. It is not important that the pegs be
identical, just similar.
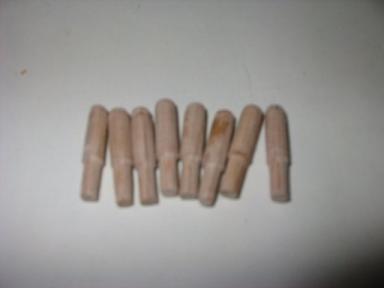 Eight pegs are finished. I usually dip them in the same finish that I use on
the top, and I stick them in holes in a scrap board to dry. I wonĺt put them into
the deck until after I have polished it.
Eight pegs are finished. I usually dip them in the same finish that I use on
the top, and I stick them in holes in a scrap board to dry. I wonĺt put them into
the deck until after I have polished it.
I did something special for "Mount Doomĺs" pegs. I wanted them to look like black towers in Mordor, so I fashioned them to look like small rook pieces. I then used my dremel tool with a cutting blade to put vertical slices all around the top. The peg tops then had a toothy appearance you normally see in castle wall tops. My cuts were not perfectly regular, which added to the effect of "evil" towers. I then painted them black, and I put a drop of diluted red paint in the top of each one.