
home for-sale how-we-build crokinole crokinole-gallery about-us
Next page"Cowboy" will have a natural finish with no stain, so I will use a water-based finish on its deck because it will not yellow the surface. The colors are darker for "Red Wolf" and "Mount Doom", so I will use a glossy polyurethane instead. We prefer glossy rather than satin finish because the glossy ones have a better sheen after polishing. Polyurethane's natural yellow color adds depth and character to darker woods, and it is nearly half the price of the water-based finishes.
 I wipe off the decks and stain those I plan to stain, both
top and bottom. There are no special tricks in staining. On birch, I usually
use a pre-stain first when I use light colored stains, but otherwise I do what
it says on the can. I make sure that I let the decks dry 24 hours before I
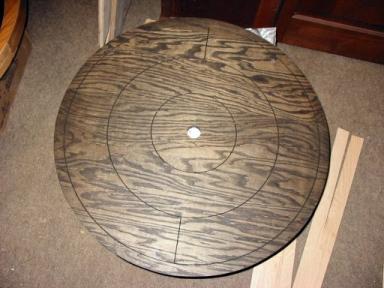
apply anything else. I stained the top and bottom of "Mount Doom" with ebony stain.
I wipe off the decks and stain those I plan to stain, both
top and bottom. There are no special tricks in staining. On birch, I usually
use a pre-stain first when I use light colored stains, but otherwise I do what
it says on the can. I make sure that I let the decks dry 24 hours before I
apply anything else. I stained the top and bottom of "Mount Doom" with ebony stain.
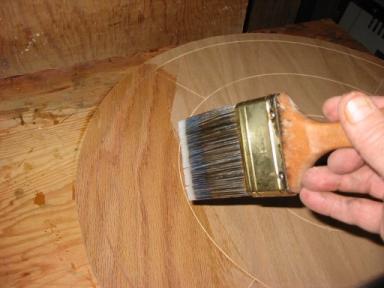 I use a 3" brush to apply Minwax Polycrylic to the deck of "Cowboy."
I especially like water-based finishes because I can clean the brushes
with soap and water. I apply the finish quickly, trying to get as much finish
into the grooves as possible. I conclude by dragging the brush with even pressure
along the grain, working from one side to the other in parallel strokes.
This finish type dries out quickly, so I must stroke in the grain direction as I
work across the board.
I use a 3" brush to apply Minwax Polycrylic to the deck of "Cowboy."
I especially like water-based finishes because I can clean the brushes
with soap and water. I apply the finish quickly, trying to get as much finish
into the grooves as possible. I conclude by dragging the brush with even pressure
along the grain, working from one side to the other in parallel strokes.
This finish type dries out quickly, so I must stroke in the grain direction as I
work across the board.
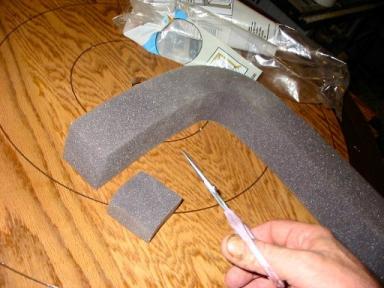 We use a foam pad to apply polyurethane. Oil-based finishes require mineral
spirits to clean up the brushes, which is a tremendous nuisance. Foam is better
because we can discard them after use. Commercial foam brushes can be expensive,
so we make our own from inexpensive foam used to insulate air conditioners.
It comes in a long strip, and we cut off a small chunk whenever we need it.
A sponge will last about a day. In between uses, I wrap it loosely in wax paper.
We use a foam pad to apply polyurethane. Oil-based finishes require mineral
spirits to clean up the brushes, which is a tremendous nuisance. Foam is better
because we can discard them after use. Commercial foam brushes can be expensive,
so we make our own from inexpensive foam used to insulate air conditioners.
It comes in a long strip, and we cut off a small chunk whenever we need it.
A sponge will last about a day. In between uses, I wrap it loosely in wax paper.
 I apply polyurethane by dipping my sponge into the finish and rubbing it onto the board.
Once I finish, I then go back over the board, wiping with even strokes in the direction
of the grain, much as you mow a lawn. This last step is important because it smoothes
out the finish, removing bubbles and puddles. It is a good idea, by the way, to leave
hairs and dust nibs alone because you will get them in the next sanding.
I apply polyurethane by dipping my sponge into the finish and rubbing it onto the board.
Once I finish, I then go back over the board, wiping with even strokes in the direction
of the grain, much as you mow a lawn. This last step is important because it smoothes
out the finish, removing bubbles and puddles. It is a good idea, by the way, to leave
hairs and dust nibs alone because you will get them in the next sanding.
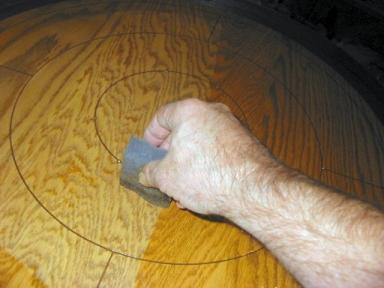
 After the finish dries, which takes two to five hours,
I sand the surface with 120 or 220 grit sandpaper and then apply another
coat of finish. I repeat again and again (finish, sand, finish, sand) until I
have applied anywhere from six to ten coats. This process takes days. It is
important not to rush or skip steps. The finish is very delicate at this
stage because it is like a thin plastic membrane that is stretched over the
board. If I am not careful and tear a hole through it,
then I will have to sand the entire surface down to wood and start over.
After the finish dries, which takes two to five hours,
I sand the surface with 120 or 220 grit sandpaper and then apply another
coat of finish. I repeat again and again (finish, sand, finish, sand) until I
have applied anywhere from six to ten coats. This process takes days. It is
important not to rush or skip steps. The finish is very delicate at this
stage because it is like a thin plastic membrane that is stretched over the
board. If I am not careful and tear a hole through it,
then I will have to sand the entire surface down to wood and start over.
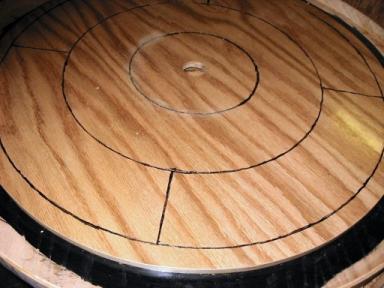
I continue the process of finishing the deck until I can no longer see wood grain and I have nearly filled the line grooves with finish. In the early finishing stages, if I hold the board up to the light, I will see hills and valleys where finish has molded itself around the wood grain. I cannot polish the board in this state, so I must apply enough finish to make the grain disappear. I also want to fill up the line grooves as much as possible. It won’t hurt if the grooves are not completely flush to the surface, but I want them to be nearly so, partly for appearance and partly because I do not want them to collect powders.
It is very important that I sand with fine sandpaper between coats. The books say this makes the next coat grip better, but I do it to level the surface. I want the sandpaper to trim off the edges of the high spots (the "hills"). Sanding also removes the hairs and nibs (dust spots), and I must remove them before I apply the next coat.
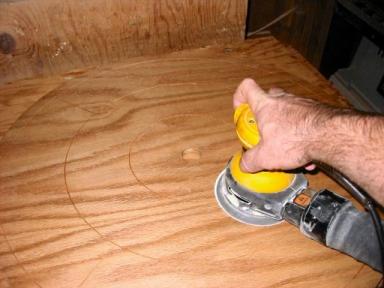
I use a random orbital sander between coats except for the first two coats over stain, which I sand by hand. It is an absolute disaster if I sand though the finish and the stain, making a bare spot, because it is impossible to patch, and the only recourse I have is to sand the board down to bare wood and start again. Once I get a couple coats down, I can use my orbital sander.
 "Cowboy" has a natural surface, and so the grooves did not darken enough.
After I have applied three coats of finish, either I wipe a dark stain over
the grooves or I paint them with a small brush. When it dries, I sand the
residue off the surface. I do it over finish and not bare wood because it is
easier to remove stain or paint from a finished surface.
"Cowboy" has a natural surface, and so the grooves did not darken enough.
After I have applied three coats of finish, either I wipe a dark stain over
the grooves or I paint them with a small brush. When it dries, I sand the
residue off the surface. I do it over finish and not bare wood because it is
easier to remove stain or paint from a finished surface.